Agile Model for Remote Computing
In this post, I present the basics for conducting Python-based simulations on a remote server. This post is not supposed to be the most detailed, but serves a different purpose: to give pointers to the uninitiated reader in order to be readily and quickly operational. In order to review all the different concepts, I have chosen as a narrative arc to follow the Agile development model.
Development model
Amongst the various software development models, I will focus on one of the most popular, namely Agile. An Agile sprint is made of 6 steps illustrated below.
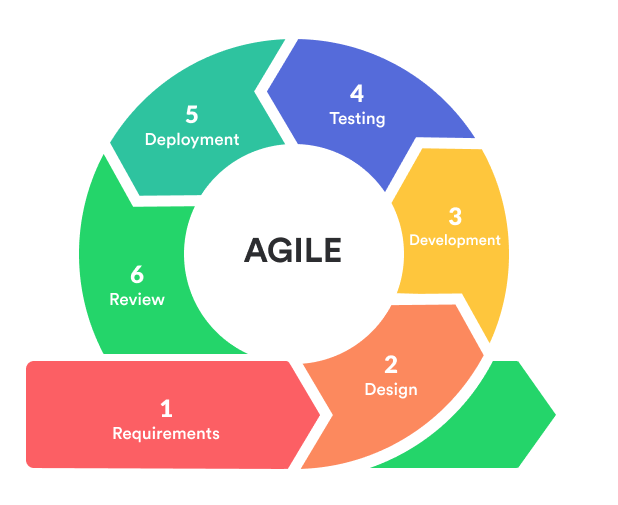
During the development of the experiments, you will go through multiple successive sprints until the final results are satisfactory. In the context of developping and conducting experiments on a remote server, one can interpret each step of the sprint as follows.
- Requirements: gathering the requirements
- Design: thinking of the experiments to conduct
- Development: implementing the numerical experiments
- Testing: checking faulty parts of the code and creation of a reproducible environment
- Deployment: running of the numerical experiments on remote computing services
- Review: retrieving and analyzing the experimental results
In a nutshell, my work method is the following. I will always keep a copy locally on my computer to develop, prepare and test the experimental settings. All along, I will use GitHub to control the versions. Once all is set up, I will update the latest toolbox to GitHub. Then, I will retrieve the toolbox from GitHub on all the remote servers that I am planning to use for performing the experiments. Finally, I will retrieve the results from the distant servers in order to be analyzed locally.
1. Requirements
It is almost certainly likely that your code relies on other codes, libraries, modules or packages to run properly. For instance, for deep learning experiments in Python, you might have to resort to Numpy, Pytorch or TensorFlow to name a few. Most importantly, your code might require some specific versions to function.
The requirements text file is a simple text file precisely listing all the external requirements including their version.
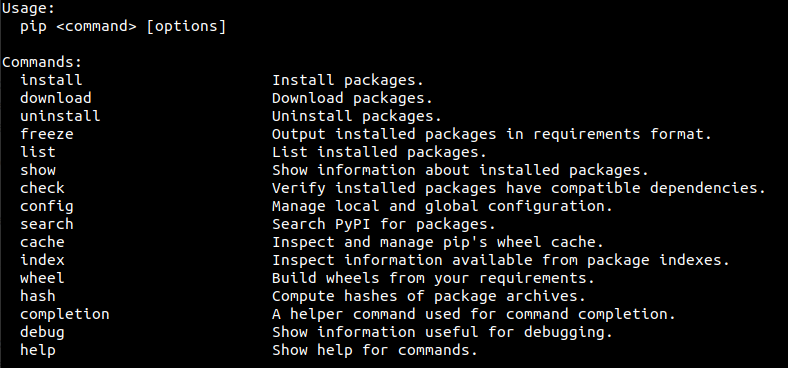
The most common way you will find to automatically create the requirements text file is to freeze your Python project with the command:
pip freeze > requirements.txt
However this method has two main disadvantages. First, it only saves packages that have been installed with the pip install command. Second, it saves all packages including those which are not used.
Instead, I have found a nice package, named pipreqs, which precisely solves these issues. It permits to create a minimal requirements text file with the instruction:
pipreqs <path_to_project>
2. Design
This part of the development model is devoted to the design your experiments. This notably includes to evaluate the goal(s) of the experiments as well as choosing:
- the data
- the numerical setting
- the hyper-parameters or the hyper-parameters grids to check from
- the stopping criterion
- the evaluation metrics
This is a crucial step in the development process since the relevance of your experiments will directly be affected. So take your time. If I can give you some pieces of advice: start small and take small steps before thinking big!
3. Development
It is in this section that takes place the actual implementation of your algorithm and experiments.
Before reaching the optimal version of your software/experiments, you will certainly go through many drafts with more or less success. It is thus crucial to keep track of all the changes made through its development. This means knowning what, when, and why something has changed in your code. This process is called version control.
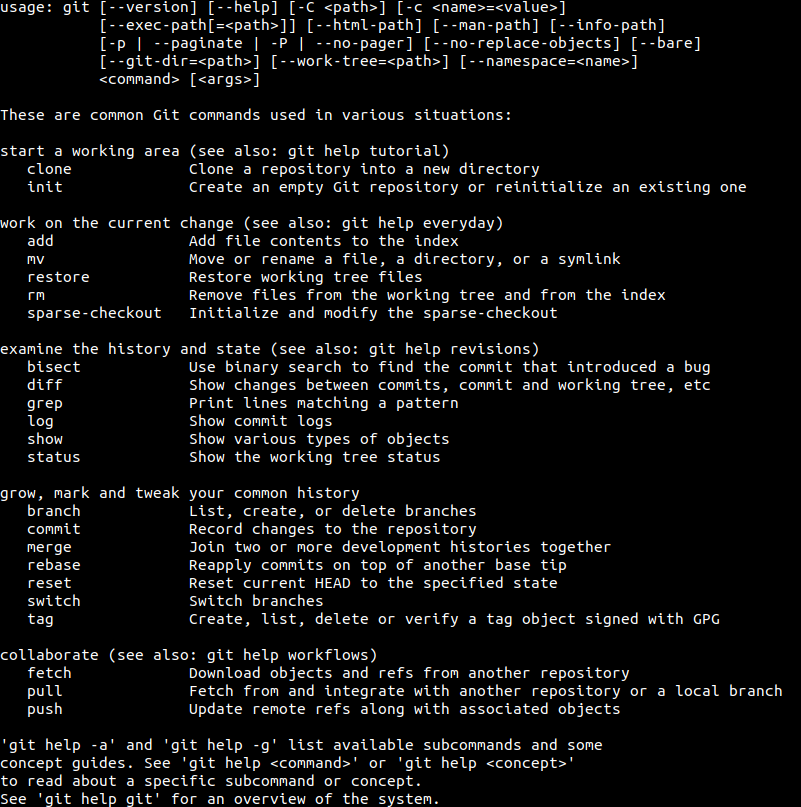
I personally use GitHub for version control, but other solutions could be envisaged. It is based on Git and notably permits to host and manage files. I strongly advise checking all the opportunities offered by git, such as branching and merging. Here, I will keep it light and only work on a single master branch.
In order to add all locally added/modified/deleted files in the current directory project (and all subdirectories) to the git index, one can type:
git add -A
Note that in order to add a single <file> or to add everything but omit the deletions, one can use git add <file> or git add ., respectively. The next step is to set a new checkpoint for keeping track of the changes. It is done through the commit command as follows:
git commit -m "<commit_message>"
There, the <commit_message> should be chosen appropriately to reflect the changes made.
Now, after committing the changes, everything is set up to push the changes to GitHub by using
git push https://<token>@github.com/<path_to_repository>.git
You can get your token here.
At this point, a new version of your code should be successfully updated to GitHub.
4. Testing
Your code should now be ready for testing. A stage, staging or pre-production environment is an environment for testing that exactly resembles the one used for developping and the one that will be used for production.
To date, there exist many ways to create a virtual python environment. For instance, you can refer to the following packages, to name a few.
In what follows, I will solely consider the package venv since it is natively shipped with Python 3. Henceforth, it is very likely that it will be available on your remote computing device.
Create your environment by typing
python -m venv <path_to_environment>
Activate your environment by
source <path_to_environment>/bin/activate
Install the requirements (see requirements file previously disccused here)
python -m pip install -r requirements.txt
You should now have a working Python environment in which you can test your experiments to make sure they are running as expected.
5. Deployment
Finally, everything is ready to be deployed on a remote computing device to produce the experimental results so anticipated.
5.1. Interacting with a remote server
As obvious as it may seem, the first step towards interacting with a remote server is to be able to connect to and disconnect from it. In order to establish a communication between two shells over a network, we use a communication protocol. The latter is a set of rules that allows multiple entities to exchange information.
The Secure Shell Protocol (SSH) is both an application and a communication protocol. The most obvious use for SSH is to allow the user to access a shell on a remote machine. The corresponding command reads
ssh <login>@<server_address>
where <login> denotes your user login and <server_address> is remote machine location. After typing Enter, you will usually be asked to enter the password for the specified user.
5.2. Setting your experimental project
Now that we are able to connect to the remote server, we can set our experimental project.
5.2.1. Download your files
From your remote server, you can create a clone of your repository by typing the following command in the command-line shell.
git clone https://<token>@github.com/<path_to_repository>.git
If the repository already exists, you only need to pull the changes as follows
git pull https://<token>@github.com/<path_to_repository>.git
Note that if you have some issues, you can always reset your branch with the command:
git reset --hard HEAD
5.2.2. Download external files
In order to download external files (e.g., datasets) from the Internet, one can use the Wget program. Note that the latter is installed by default on the latest Ubuntu versions. In order to download a file located at <url>, the basic command reads:
wget <url>
5.3. Managing sessions
A Terminal Multiplexer allows to efficiently manage multiple terminal sessions simultaneously in a single window. The most popular applications are tmux and Screen. I personally use the two interchangeably with a preference for Screen since it is usually installed by default on all major Linux distributions.
Hereafter, we will cover a nice feature of terminal multiplexers, namely the ability to detach and reattach sessions from a terminal. This feature comes particularly handy when you are running simulations on a remote server. In order to create a session, the command reads
screen -S <name_of_session>
where <name_of_session> is the name you wish to give to your session. I usually use a name that allows me to track what is the purpose and the specificity of the numerical simulation that will be running inside this session. After typing Enter, you should be prompt with the said new shell session. It is inside that session that you should run your experiment.
If you wish to detach from the session, you can type Ctrl + a followed by d. Having the simulations run under screen means that the session does not terminate – only the now-defunct terminal gets detached – so the simulation is still running, and the applications don’t even know the terminal has detached. The user can reattach the session by typing
screen -r <name_of_session>
in order to continue checking upon the simulation. If you have multiple sessions running, you can list all your sessions with the following command screen -ls. Finally, a screen can be killed by typing exit inside it.
5.4. Runing your experiments
Once inside the appropriate session, you can activate your Python environment as previously discussed here. You are thus left with running your Python experiment (e.g. python <experiment_name>.py).
5.5. Monitoring processes and activities
Monitoring your numerical simulation activity is essential to make sure that it properly uses all the available resources at their maximum capacity. In order to list all processes running and their CPU usage, one can use the Unix program htop. It will notably come handy to check if your simulation uniformly uses all cores or if another process is currently running.
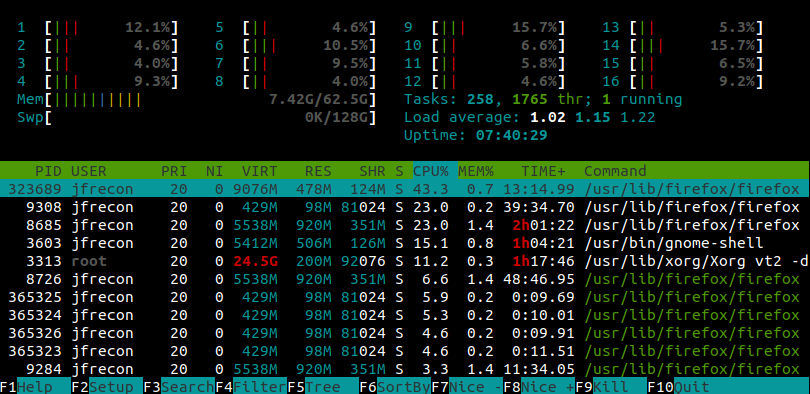
If you are lucky enough, you may have some high-end GPUs which will be used to run your experiments. In order to check the GPU usage, you can use the nvtop program (available here). Nvtop stands for Neat Videocard TOP and acts as a htop like task monitor for both AMD and NVIDIA GPUs.
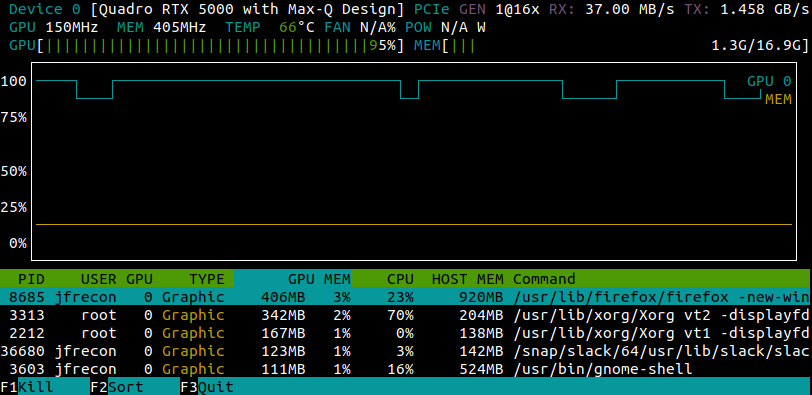
However, you might not have the appropriate rights to install such program. Nevertheless, all is not lost. Chances are that your server will have some NVIDIA GPUs. In that case, you can also resort to the NVIDIA System Management Interface through the command nvidia-smi. In order to have a real-time monitoring, you can use the watch bash command, for instance:
watch -n0.1 nvidia-smi
will update the display of the GPU usage every 0.1 seconds.

6. Review
Once your simulations are done, it is now time to retrieve your results in order to analyze them locally on your personnal computer.
To download the results, we are going to use a command-line program based on a communication protocol allowing both file access and file transfer. When it comes to download files or to transfer files between two hosts, there exist a plethora of solutions. Probably the two most popular are sftp and scp. The former uses the Secure File Transfer Protocol (SFTP) while the latter relies on the Secure Shell Protocol (SSH).
Concerning scp, aka secure copy, the commands for downloading a source file or a source folder read
scp <login>@<server_address>:<path_to_source_file> <path_to_local_target_file>
scp -r  <login>@<server_address>:<path_to_source_folder> <local_target_folder>
Conclusion
Finally, you can repeat these sprints agile multiple times until you get the results expected. If you want to go further, you can check SetupTools Development Mode and Docker.
Acknowledgments
Thanks Bamdad for your precious comments. It is always a pleasure!
Appendix: shell
In computing, the interface permitting the human user to use the system services and programs is called the shell. Its name comes from the fact that it is the outermost layer around the operating system with which the user can interact.
There are two types of shells. On the one hand, graphical shells, also referred to as graphical user interfaces (GUI), are the most widely known. They have been popularized by Apple in the early 80s and allow the user to simply interact through direct manipulations of icons, text fields, menus, etc. Basically, it is what you see when you start your personal computer. On the other hand, command-line shells, also called command-line interfaces (CLI), permit to interact by typing instructions on your keyboard. Popular instances are the Command prompt in Windows or Terminal/Bash in Unix systems.
In this post, I have assumed that you know the basic instructions (see Bash command language) of Unix shell scripting whose essentials are recalled below.
| Command | Description |
|---|---|
| ls | List directory contents |
| pwd | Print working directory |
| cd REP | Change the working directory to REP |
| mkdir REP | Make directory REP |
| rmdir REP | Remove empty directory REP |
| cp FIL1 FIL2 | Copy file FIL1 into FIL2 |
| mv FIL1 FIL2 | Move or rename file FIL1 into FIL2 |
| rm FIL | Remove file FIL |